Vue CLI 3の開発環境をDockerで作成してみた
当社では一部のプロダクトでJavaScriptフレームワークの Vue.js を導入しています。
Vue.jsは低い学習コストで手軽に始められて非常に便利ですが、アプリケーションの規模が大きくなってくると、アプリケーションの管理が辛くなってきました。
Vue.jsにはVueアプリケーション用に標準ビルドツールチェーンの Vue CLI 3が提供されており、Vue CLIを使う事でアプリケーションをコンポーネント単位で管理する事ができるようです。
今回はVue CLIを使って開発できるように、Dockerを使って開発環境を構築してみたいと思います。
- Windows 10 Home
- VirtualBox 6.0.4
- Vagrant 2.2.4
- CentOS Linux release 7.6.1810 (Core)
- Docker version 18.02.0-ce, build fc4de44
- docker-compose version 1.14.0, build c7bdf9e
INDEX
Vue CLIのDockerファイルを作成する
2019年4月現在Docker HubにVue CLIの公式のDockerイメージは提供されていないので、Node.jsの公式イメージからVue CLIをインストールしたイメージを作成します。
Vue CLIのドキュメントを参考に、Vue CLIをインストールします。
Dockerfile
FROM node:10.15.3-alpine

WORKDIR /app

RUN npm install -g @vue/cli

CMD ["/bin/sh"]
補足
- FROM node:10.15.3-alpine
Node.jsの公式イメージから軽量なLinuxディストリビュージョンのAlpine LinuxのLTS版を選択します。
- WORKDIR /app
作業ディレクトリを/appに指定します。
- RUN npm install -g @vue/cli
Vue CLIをグローバルインストールします。
- CMD [“/bin/sh”]
コンテナ実行時のデフォルトコマンドに/bin/shを指定します。
Vue CLIのDockerファイルを作成する
作成したDockerfileと同階層でbuildコマンドを実行します。
$ docker build -t vue-cli:latest .-t オプションでDockerイメージの名前とタグを指定します。
作成したDockerイメージを確認します。
$ docker images実行結果
REPOSITORY               TAG                    IMAGE ID            CREATED              SIZE
vue-cli                  latest                 314ab8710424        About a minute ago   163MB
Vue CLIのDockerコンテナを起動する
作成したDockerイメージの名前を指定して起動してみます。
$ docker run -it --rm -v "$PWD":/app vue-cliDockerコンテナ内
/app # vue --version
3.5.3
Vue CLIが無事にインストールされていますね。
Vue CLI用Dockerコマンドのスニペットを登録する
このままでもVue CLIを使うことはできますが、毎回dockerのコマンド打つのは大変ですので、bash関数を.bashrcに登録します。
vue () {
    tty=
    tty -s && tty=--tty
    docker run \
        $tty \
        --interactive \
        --rm \
        --volume /etc/passwd:/etc/passwd:ro \
        --volume /etc/group:/etc/group:ro \
        --volume "$HOME":"$HOME" \
        --volume "$PWD":/app \
        --user "$(id -u):$(id -g)" \
        vue-cli \
        vue "$@"
}

yarn () {
    tty=
    tty -s && tty=--tty
    docker run \
        $tty \
        --interactive \
        --rm \
        --volume /etc/passwd:/etc/passwd:ro \
        --volume /etc/group:/etc/group:ro \
        --volume "$HOME":"$HOME" \
        --volume "$PWD":/app \
        --user "$(id -u):$(id -g)" \
        -p 8080:8080 \
        vue-cli \
        yarn "$@"
}
.bashrcを再読み込みした後に、スニペットが実行されるか確認してみます。
$ source ~/.bashrc
$ vue --version
3.5.3
vue-cliコンテナのVue CLIのバージョンが確認できました。
プロジェクトを作成する
Vue CLIのドキュメントを参考に、プロジェクトを作成してみます。
参考: Creating a Project | Vue CLI
$ vue create hello-worldプリセットとインストールに使うパッケージマネージャを選ぶように指示されるので、今回はデフォルトのプリセットとYarnを選択してみます。
Vue CLI v3.5.3
? Please pick a preset: default (babel, eslint)
? Pick the package manager to use when installing dependencies: (Use arrow keys)
❯ Use Yarn
  Use NPM

Vue CLI v3.5.3
✨  Creating project in /app/hello-world.
⚙  Installing CLI plugins. This might take a while...

yarn install v1.13.0
info No lockfile found.
[1/4] Resolving packages...
[2/4] Fetching packages...
info fsevents@1.2.7: The platform "linux" is incompatible with this module.
info "fsevents@1.2.7" is an optional dependency and failed compatibility check. Excluding it from installation.
[3/4] Linking dependencies...
[4/4] Building fresh packages...
success Saved lockfile.
info To upgrade, run the following command:
$ curl --compressed -o- -L https://yarnpkg.com/install.sh | bash
Done in 22.99s.
🚀  Invoking generators...
📦  Installing additional dependencies...

yarn install v1.13.0
[1/4] Resolving packages...
[2/4] Fetching packages...
info fsevents@1.2.7: The platform "linux" is incompatible with this module.
info "fsevents@1.2.7" is an optional dependency and failed compatibility check. Excluding it from installation.
[3/4] Linking dependencies...
[4/4] Building fresh packages...

success Saved lockfile.
Done in 12.88s.
⚓  Running completion hooks...

📄  Generating README.md...

🎉  Successfully created project hello-world.
👉  Get started with the following commands:

 $ cd hello-world
 $ yarn serve
yarnコマンドでサーバを立ち上げて確認する
プロジェクト作成時の最後に出ているコマンドを実行して、サーバを立ち上げて確認してみます。
$ cd hello-world
$ yarn serve
実行すると以下の様にURLが表示されるので、ブラウザでアクセスして確認します。
DONE  Compiled successfully in 6109ms
8:47:51 AM

  App running at:
  - Local:   http://localhost:8080/

  It seems you are running Vue CLI inside a container.
  Access the dev server via http://localhost:<your container's external mapped port>/

  Note that the development build is not optimized.
  To create a production build, run yarn build.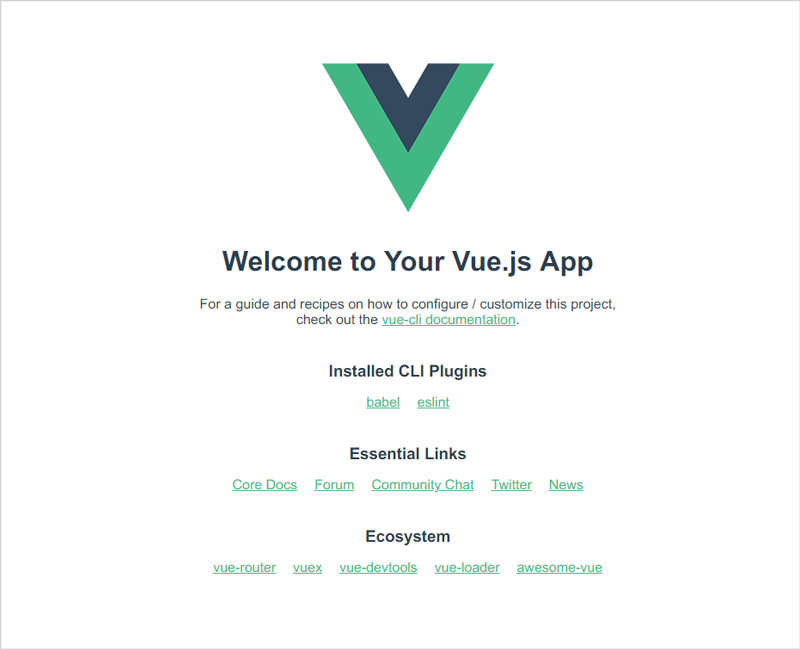
Vagrantのネットワーク設定について
Vagrantのネットワーク設定でNATを選択している場合には、forwarded_portの設定を行なわないとアクセスができないのでご注意ください。
Vagrantfile
config.vm.network "forwarded_port", guest: 8080, host: 8080Vagrantのネットワーク設定でBridgeを選択している場合には、表示されたURLの`localhost`の部分を適宜VMに割り当てられているIPアドレスに変更してアクセスしてください。
docker-compose.ymlを作成する
筆者はdockerコマンドよりもdocker-composeコマンドをよく使っているので、docker-composeコマンドでも使えるようにします。vue-cliコンテナで作成したDockerfileをプロジェクト直下に配置してdocker-compose.ymlを作成します。
docker-compose.yml
version: '3'

services:

   node:
     build:
        context: .
        dockerfile: Dockerfile
     command: "yarn run serve"
     ports:
       - "${NODE_PORT:-8080}:8080"
     volumes:
       - ".:/app"
ディレクトリ構成
hello-world/
├── babel.config.js
├── docker-compose.yml
├── Dockerfile
├── node_modules
├── package.json
├── public
├── README.md
├── src
└── yarn.lock
docker-composeコマンドでnodeサーバを起動してみます。
$ docker-compose up -d
Creating network "helloworld_default" with the default driver
Creating helloworld_node_1 ...
Creating helloworld_node_1 ... done
Attaching to helloworld_node_1
node_1  | yarn run v1.13.0
node_1  | $ vue-cli-service serve
node_1  |  INFO  Starting development server...
node_1  |  DONE  Compiled successfully in 6230ms9:04:51 AM
node_1  |
node_1  |
node_1  |   App running at:
node_1  |   - Local:   http://localhost:8080/
node_1  |
node_1  |   It seems you are running Vue CLI inside a container.
node_1  |   Access the dev server via http://localhost:<your container's external mapped port>/
node_1  |
node_1  |   Note that the development build is not optimized.
node_1  |   To create a production build, run yarn build.
node_1  |
Webリクエストを送って動作を確認してみます。
$ curl -Ss localhost:8080 -I
HTTP/1.1 200 OK
X-Powered-By: Express
Accept-Ranges: bytes
Cache-Control: public, max-age=0
Last-Modified: Fri, 29 Mar 2019 09:17:13 GMT
ETag: W/"22f-169c8bd2732"
Content-Type: text/html; charset=UTF-8
Content-Length: 559
Date: Tue, 07 May 2019 08:19:57 GMT
Connection: keep-alive
docker-composeコマンドでも起動ができるようになりました。
さいごに
Dockerを使ったVue CLIの開発環境の構築は以上です。
Vue CLIを使うことでプロジェクトの作成までが簡単にできる印象でした。
フロントエンド開発技術を取り入れながら、ユーザビリティやUX(User Experience)の向上を目指していきたいと思います。
この記事を書いた人

- 事業開発部 web application engineer
- 2013年にアーティスに入社。システムエンジニアとしてアーティスCMSを使用したWebサイトや受託システムの構築・保守に携わる。環境構築が好き。
この執筆者の最新記事
- 2024年4月25日WEBReactでフォーカス可能な要素にフォーカスを当てる方法
- 2024年2月15日WEBmonorepoを1つのStorybookで管理したい!その手順と遭遇した問題を解説します。
- 2023年12月12日WEBReact Hook FormでZodを使ってフォームの入力値をAPIのデータ形式に変換したい!
- 2023年9月13日WEB複数OSに対応しているchezmoiを使ってdotfilesを効率的に管理する
関連記事
最新記事
FOLLOW US
最新の情報をお届けします
- facebookでフォロー
- Twitterでフォロー
- Feedlyでフォロー

