Codeigniter4.4が出ていたので簡単なフォームを作りながら基礎を学んでみる

皆さんがPHPアプリケーションのフレームワークと聞いて何を思い浮かべますでしょうか?
筆者は弊社アプリケーション開発でもよく使われるCodeIgniter3やSlim4が真っ先に思い浮かびます。
その中でもCodeIgniterはバージョン3を使っており、バージョン4がリリースされた当初に使ってみましたが個人的にはあまりしっくりこず、それ以降あまり触っていませんでした。
ですが、2023年8月24日にバージョン4.4.0がリリースされており、これを機にもう一度勉強してみようと思いました。
今回は、インストールから簡単なフォームアプリの作成までを追っていきたいと思います。
筆者の環境
PHP7.4.33
(docker-image php:7.4.33-apache-buster)
CodeIgniter4のインストール
公式ドキュメントによると、ComposerInstallとManualInstallの2種類が可能なようです。
今回はバージョン管理を行いやすくするため、Composerを用いてインストールしていこうと思います。
アプリケーションを設置するディレクトリで下記のコマンドを実行します。
※ project-rootはCodeIgniterのディレクトリ名になります。
composer create-project codeigniter4/appstarter ${project-root}実行結果
$ composer create-project codeigniter4/appstarter ci4test
Creating a "codeigniter4/appstarter" project at "./ci4test"
Cannot create cache directory /.composer/cache/repo/https---repo.packagist.org/, or directory is not writable. Proceeding without cache. See also cache-read-only config if your filesystem is read-only.
Installing codeigniter4/appstarter (v4.4.1)
Cannot create cache directory /.composer/cache/files/, or directory is not writable. Proceeding without cache. See also cache-read-only config if your filesystem is read-only.
  - Downloading codeigniter4/appstarter (v4.4.1)
  - Installing codeigniter4/appstarter (v4.4.1): Extracting archive
Created project in /var/www/html/ci4test
Loading composer repositories with package information
Cannot create cache directory /.composer/cache/repo/https---repo.packagist.org/, or directory is not writable. Proceeding without cache. See also cache-read-only config if your filesystem is read-only.
Updating dependencies
Lock file operations: 35 installs, 0 updates, 0 removals
  - Locking codeigniter4/framework (v4.4.1)
  - Locking doctrine/instantiator (1.5.0)
  - Locking fakerphp/faker (v1.23.0)
  - Locking laminas/laminas-escaper (2.12.0)

  ・・・中略・・・

  - Installing phar-io/version (3.2.1): Extracting archive
  - Installing phar-io/manifest (2.0.3): Extracting archive
  - Installing myclabs/deep-copy (1.11.1): Extracting archive
  - Installing doctrine/instantiator (1.5.0): Extracting archive
  - Installing phpunit/phpunit (9.6.13): Extracting archive
17 package suggestions were added by new dependencies, use `composer suggest` to see details.
Generating optimized autoload files
27 packages you are using are looking for funding.
Use the `composer fund` command to find out more!
No security vulnerability advisories found.
無事インストールが完了しました。
CodeIgniter4のフロントコントローラ
CodeIgniter3ではプロジェクトディレクトリ直下にフロントコントローラの index.php が設置されていましたが、CodeIgniter4では public ディレクトリ内に設置されています。
CodeIgniter4のドキュメントではPHPの組み込みサーバを用いて解説されていますが、弊社ではクライアント様のサーバに直接アプリケーションを設置する場合も多々あるため、ApacheWebサーバをそのまま用いてアクセスするようにしたいです。
そのためmod_rewriteを用いて直接public内にルーティングするよう、下記 .htaccess を設置します。
$ cat ./ci4test/.htaccess
<IfModule mod_rewrite.c>
RewriteEngine On
RewriteRule ^(.*)$ public/$1 [L]
</IfModule>
<FilesMatch "^\.">
Require all denied
Satisfy All
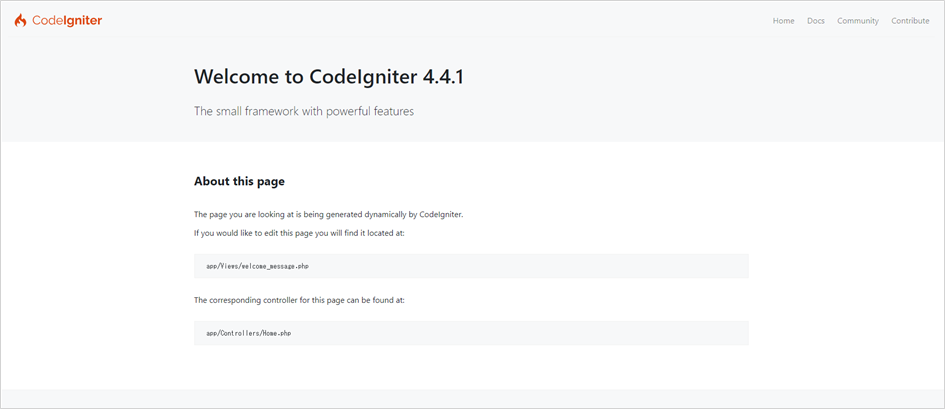
</FilesMatch>下記のURLにアクセスし、無事表示されることを確認しました。
http://localhost/ci4test/
入力ページの作成
公式ドキュメントを参考に入力ページを作成していきます。
Controller
/app/Views/input.php
<?php

namespace App\Controllers;

class Form extends BaseController
{
    public function input(): string
    {
        return view('input');
    }
}
View
/app/Views/input.php
<!DOCTYPE html>
<html lang="ja">
<head>
    <meta charset="UTF-8">
    <title>form | ci4test</title>
</head>
<body>
    <h1>テストフォーム</h1>
    <form method="post" action="http://localhost/ci4test/form">
        <input type="text" name="name" value="">
        <input type="submit" name="submit" value="送信">
    </form>
</body>
</html>
Routes
/app/Config/Routes.php
<?php

use CodeIgniter\Router\RouteCollection;

use App\Controllers\Form;

/**
 * @var RouteCollection $routes
 */
$routes->get('/', 'Home::index');

$routes->get('form', [Form::class, 'input']);
// 下記でも動作するが入力補完が効かないので上記がオススメ
// $routes->get('form', 'Form::input');
動作確認
http://localhost/ci4test/form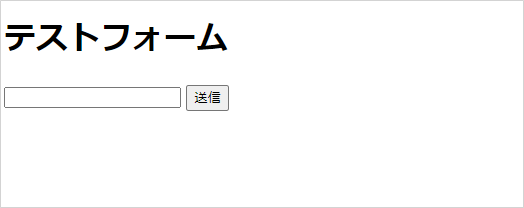
データ検証と完了ページの作成
公式ドキュメントを参考にデータ検証(validation)と完了ページを作成していきます。
POST値のCSRF対策を有効化
/app/Config/Filters.php
<?php

namespace Config;

use CodeIgniter\Config\BaseConfig;
use CodeIgniter\Filters\CSRF;
use CodeIgniter\Filters\DebugToolbar;
use CodeIgniter\Filters\Honeypot;
use CodeIgniter\Filters\InvalidChars;
use CodeIgniter\Filters\SecureHeaders;

class Filters extends BaseConfig
{
    // ・・・

    /**
     * List of filter aliases that works on a
     * particular HTTP method (GET, POST, etc.).
     *
     * Example:
     * 'post' => ['foo', 'bar']
     *
     * If you use this, you should disable auto-routing because auto-routing
     * permits any HTTP method to access a controller. Accessing the controller
     * with a method you don't expect could bypass the filter.
     */
    // public array $methods = [];
    public array $methods = [
        'post' => ['csrf']
    ];

    //・・・
}
View(inputの修正)
/app/Views/input.php
<!DOCTYPE html>
<html lang="ja">
<head>
    <meta charset="UTF-8">
    <title>form | ci4test</title>
</head>
<body>
    <h1>テストフォーム</h1>
    <?php
        // validationライブラリのエラーリスト関数
        echo validation_list_errors();
    ?>
    <form method="post" action="http://localhost/ci4test/form">
        <?php
            // csrfトークンフィールドを作成する関数
            echo csrf_field();
        ?>
        <input type="text" name="name" value="<?= set_value('name'); ?>">
        <input type="submit" name="submit" value="送信">
    </form>
</body>
</html>
Controller
/app/Controllers/Form.php
<?php

namespace App\Controllers;

class Form extends BaseController
{
    public function __construct()
    {
        // formヘルパをLoad
        helper('form');
    }

    public function input(): string
    {
        return view('input');
    }

    public function check(): string
    {
        // validationの実行
        if (!$this->validate([
            'name' => 'required'
        ])) {
            // validationエラーの場合は入力画面に戻す
            return $this->input();
        }

        $post = $this->validator->getValidated();
        return $this->thanks($post['name']);
    }

    public function thanks(string $name): string
    {
        return view('thanks', ['name' => $name]);
    }
}
View(完了ページ用)
/app/Views/thanks.php
<!DOCTYPE html>
<html lang="ja">
<head>
    <meta charset="UTF-8">
    <title>form | ci4test</title>
</head>
<body>
    <h1>テストフォーム完了</h1>
    <p>
        Hello! <?= $name; ?>
    </p>
</body>
</html>
Routes
/app/Coufig/Routes.php
<?php

use CodeIgniter\Router\RouteCollection;

use App\Controllers\Form;

/**
 * @var RouteCollection $routes
 */
$routes->get('/', 'Home::index');

$routes->get('form', [Form::class, 'input']);
// validationチェック用methodへのルーティング追加
$routes->post('form', [Form::class, 'check']);
動作確認
http://localhost/ci4test/form
入力せずに送信ボタンを押した場合
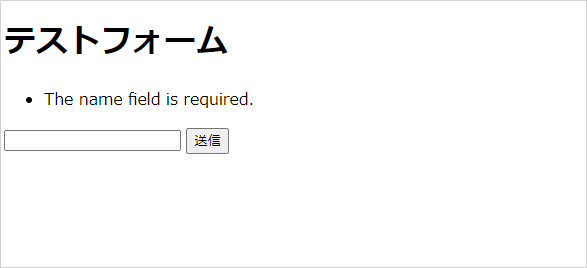
入力をした状態で送信ボタンを押した場合

問題なく動いていることが確認できました。
さいごに
今回はインストールからvalidationのある簡単なフォームを作ってCodeIgniter4の基礎を学んでみました。
リリース当初の使用感とは裏腹に、CodeIgniterらしさを残しながら、CodeIgniter3以前のバージョンではネックだった
- Controllerとmethod名を用いたセグメントベースのURLルーティング
- グローバルに使われる
$this変数 - コアライブラリの関数がスネークケース(これは筆者の好みの問題かもしれないが…)
あたりが解消され、Codeigniterを使ったことがある方であれば特に詰まることもなく、書き味もよくなっていると筆者は感じました。
この記事が、CodeIgniter4で開発を行ってみようと考えている方の参考に少しでもなれば嬉しい限りです。
この記事を書いた人

- ソリューション事業部 システムエンジニア
-
東京で2年半エンジニアとしての経験を積み、浜松にUターンの後、アーティスへ入社。
ソリューション事業部のWebエンジニアとして、システムの設計・開発・保守・運用からインフラまで幅広く従事している。
フルスタックエンジニア目指して現在も勉強の日々。車が好き。
この執筆者の最新記事
関連記事


最新記事


FOLLOW US
最新の情報をお届けします
- facebookでフォロー
- Twitterでフォロー
- Feedlyでフォロー